Objective
The military model making got the better of me this year... so naturally this project is my top priority.
Got this kit when I was on a family trip to Osaka in 2015.
It was a very memorable trip as it was exactly on my birthday when I touched down Osaka.
Dropped my luggage and head directly to the hobby store to buy it (cost me a bomb if you must ask...).
The journey back to hotel was no joke as this kit weighs in at least 10kg.
Might not seemed a lot, but considering the train rides plus the stairs to climb plus.... you get the point.
Anyway, this kit was a childhood dream come true.
Not building it well will not do it any justice.
Hence, I'm making sure it turns out just the way I visualise it.... Neat and pristine condition!
The Box Art


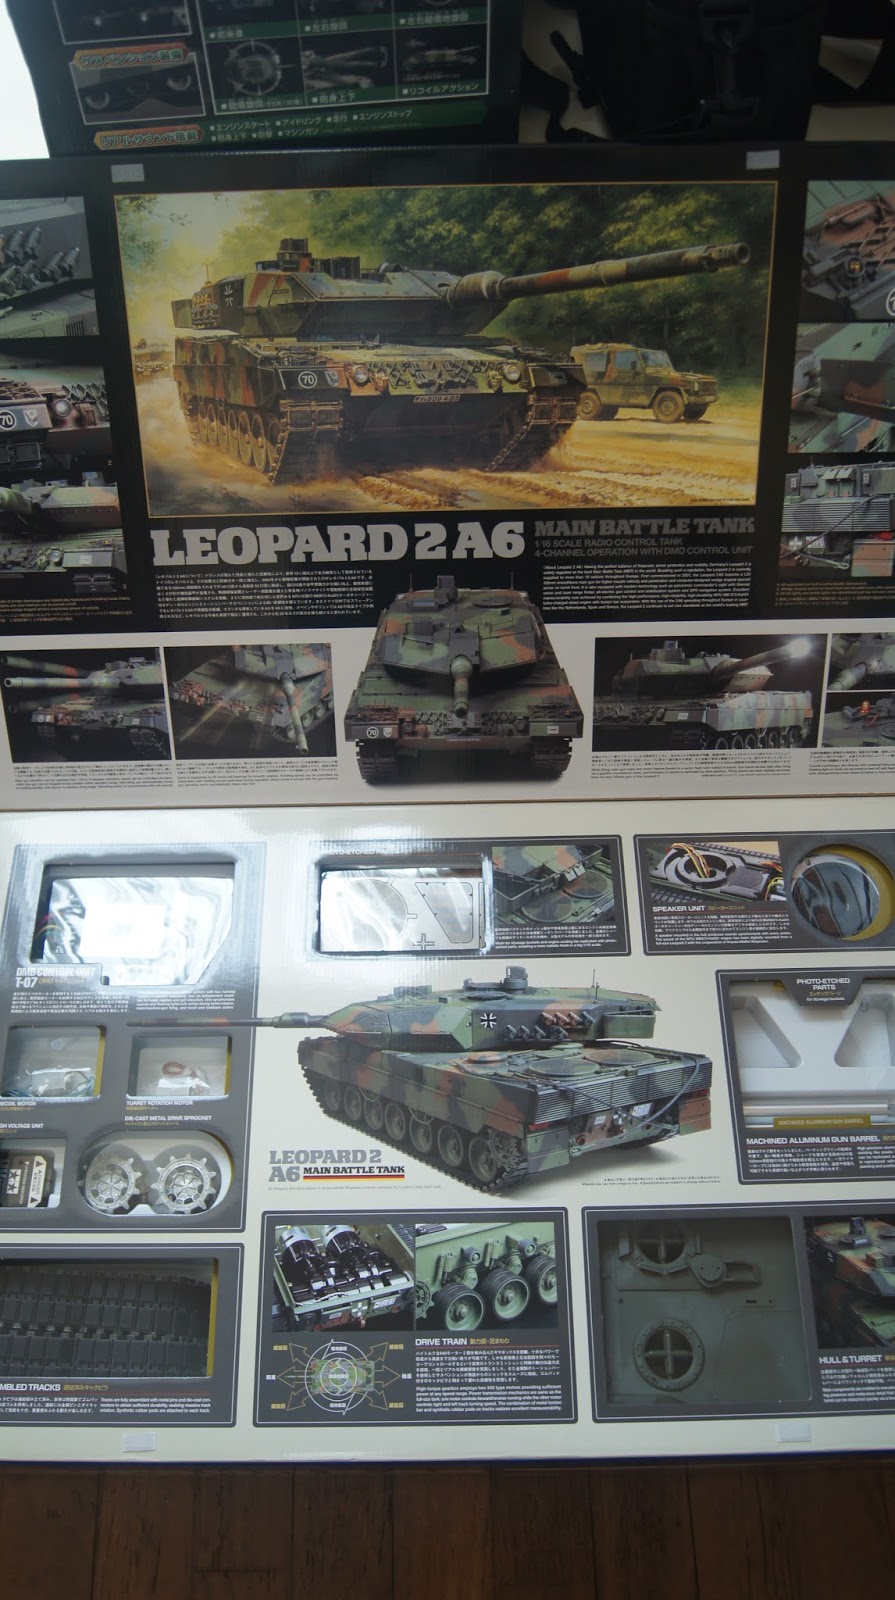

Beautiful right?
Even a full grown adult is attracted to it. What more for a kid.
But the price of this kit is no joke..
PS: My MG 1/100 Exia is there to give you an idea how big the box is.
There's more...
Since this is a Japan kit, it comes with a controller!
To keep up with current RC trend, it had included a 2.4GHz controller + a 7.2V battery.


If you have built any Master Grade or Perfect Grade Gundam, then this is a walk in the park.
Moulding seams are plenty, just take your time to scrape it off with your hobby knife or sand it down with #400 and #800 grit.
Joint seam are found only on the barrel evacuator assembly. What I did was to coat the entire metal barrel with metal primer then assemble the evacuator. As with Tamiya quality, the contact surfaces are near perfect without any hand fitting.
Other than the above, its really straightforward.
That is unless you want yours to be factually correct to the real deal (See here).
Some more pictures to show you what you are going to be building if you decide to build one.


The Painting
Ok. Now comes the tough part... Why?
Because its too damn BIG!
Even my 1/144 Dendrobium cannot match this!
I don't even know where and how to start when I look that the tank's chasis.
In the end, I had to turn on 2 spray booth to extract all the fumes. But that alone did not help. By the end of the painting, my lungs felt uncomfortable. Went for a swim to "release" that toxin (lying to myself again for the sake of this hobby)
Ok... grumbled enough.. here are some facts:
1) Black surfacer throughout the tank. (leave the muzzle break out as instructed by the manual).
2) Gundam Green for the entire base coat. (Tamiya suggested to use Nato Green but I find that Nato Green will be too dark.)
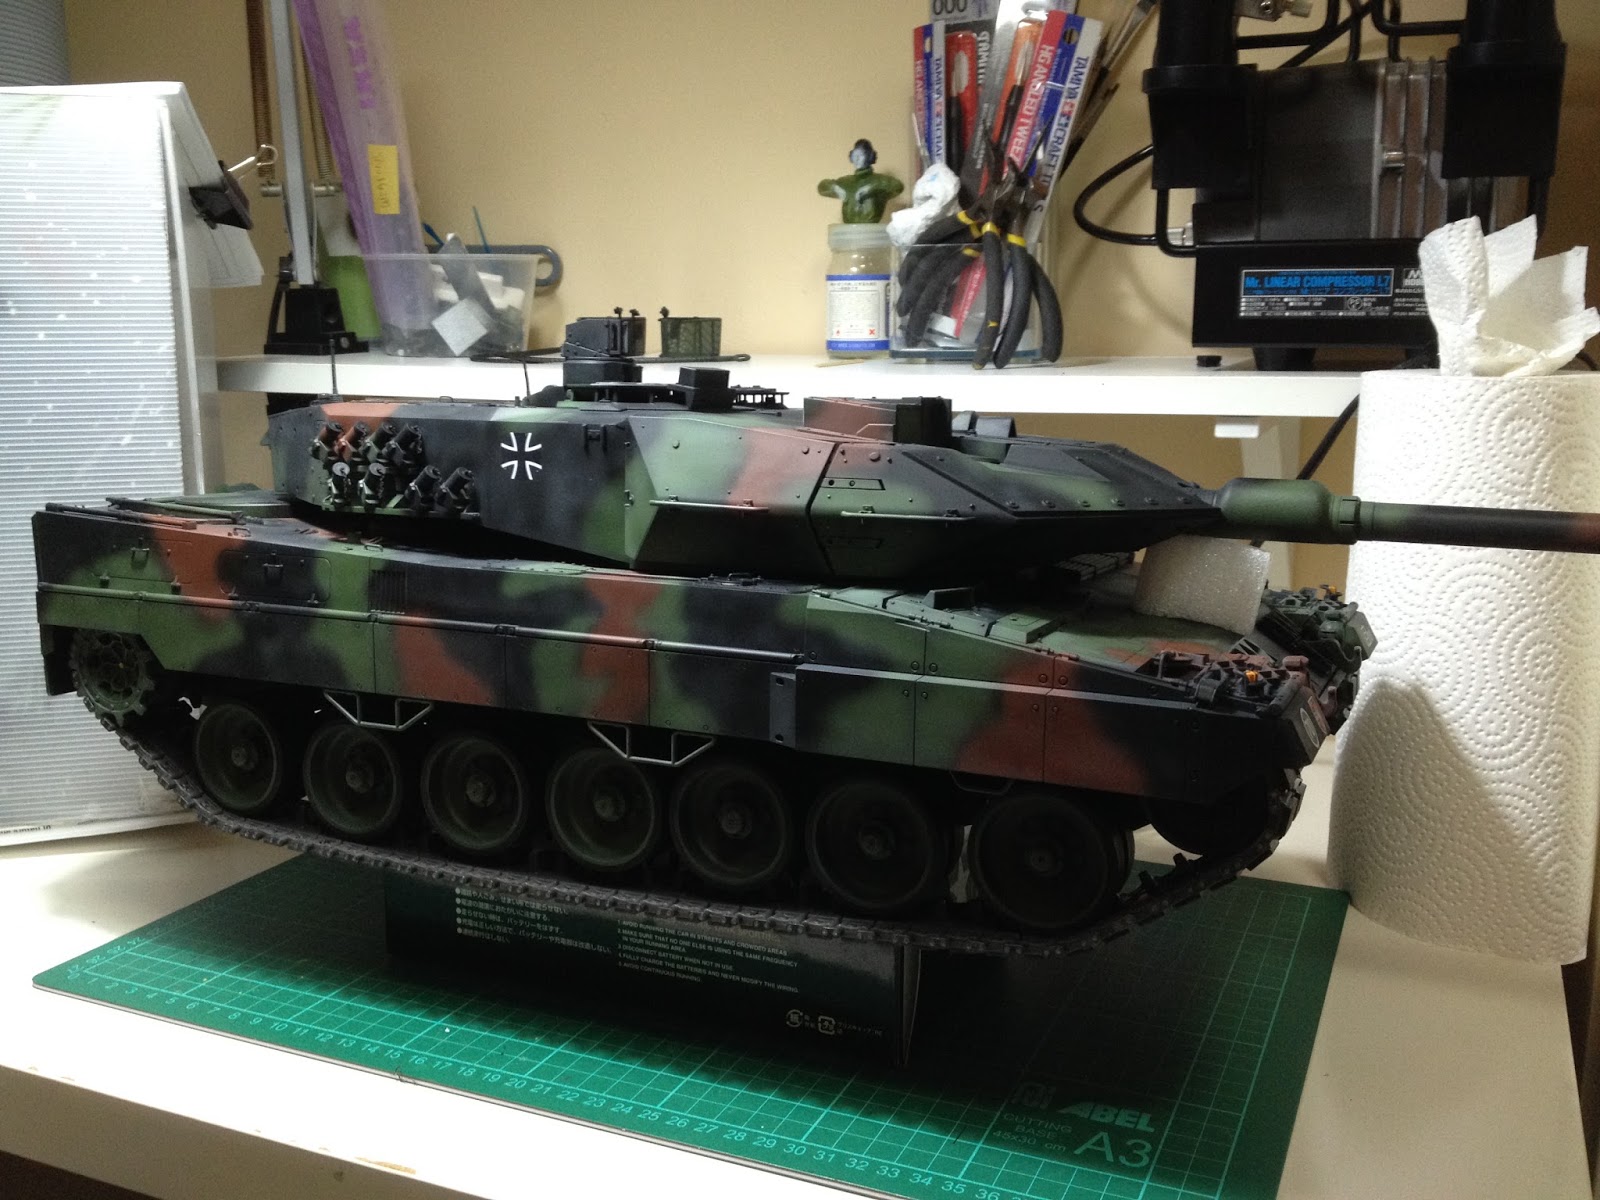
The result


3) Nato Brown and Nato Black for the camouflage.
4) Tonnes of gloss clear (3 coats as this is an RC which will help prevent scratches)
The result:


5) After detail painting, add tonnes of flat clear. (Tanks cannot be glossy right?)
The result:

After the flat clear coat, the camouflage blended in nicely.
A very satisfied achievement with the expense of weaken lungs....
Lesson learned:
1) For size like this, buy those Surfacer Spray Cans and spray outdoor!
2) To achieve the shadow, use airbrush for pre-shading then use those Spray Cans to give it a base coat
3) Buy Clear Spray Cans for your top coating.
With the above, it will definitely save time and your lungs!
The Assembly
Assembling the drivetrain. Noticed that I have added metal gears instead of the original gear provided. Read from internet that these gears are prone to stripping. So.. why not just put it in?


the wheels. Changed to full ball bearings instead of bushing. Suspension arms changed to metal ones instead of the plastic ones provided.


the lower deck ...

the upper deck...


the turret... Taking note that a 0.2 mm self made shim using plaplate is a must else turret cannot turn 360 degrees.


finally... (wiring nightmare.. took more than an hour to make sure its properly layout)


Conclusion
Excellent kit! Runs beautifully with its shear size and weight.
Easy to build, great centre display piece and infinite ways to enjoy outdoor tank wars with my kid!
After my struggle with 1/24 Hi-Nu Gundam Bust build then this overwhelming sized tank to paint, I really need a good break....
But...
the King Tiger and the new Type 10 is definitely in my list of collectables.
Problem is... where can I get that extra money and justification to buy those... hmm...
Will my next project be an easy one?
Stay tune to find out!


still following you bro :D great works as always
ReplyDeleteafter i read this I have to go buy some military plamos too!
Thanks, Bro!
ReplyDeleteMore project coming!
No time to post now. Very busy with real work now... Stay tune!